Blog

  • Clash of the fictional companies

    Clash of the fictional companies

    What happens when your company is so large that one product group’s fictional company collides with another?  I found myself in this situation while prepping a demo for next week’s talk at the TriSPUG meeting.

    contoso+aw

    It made me feel the same way as when I see people mixing Nike shoes with Adidas shorts, or a Bulls cap with a Duke t-shirt.

    Thankfully, there are compile lists of Microsoft Fictional Companies available for your review.

  • Update User Profile photo using Workflow

    Update User Profile photo using Workflow

    Update: I’ve added a video walkthrough of this technique.

    In my last post, I talked about using a Powershell script to import user profile photos from a SharePoint Picture Library in to the MySites users profile.

    That works great to sync up the photos from the library as a batch.  But what happens when you add a new employee photo to the library?  We need something to automatically update the MySite user profile, and a custom workflow will do just that.

    Here’s the general logic for our workflow:

    When an item is added or updated,

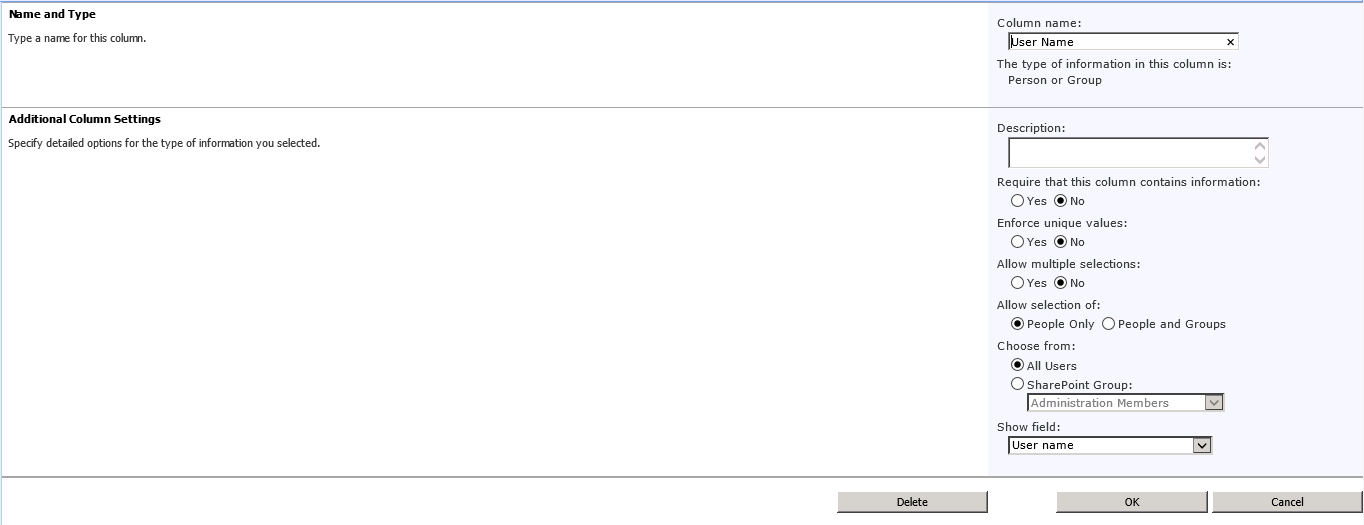
    1. Check if a User Name has been set.  If so, 
    2. Retrieve the User’s Profile
    3. Set the ‘PictureUrl’ value to the Url of the item in the picture library.
    4. Save the Profile record.
    5. Regenerate the Thumbnail sizes used by MySites.

    Unfortunately, out of the box, SharePoint Designer workflows will not allow you to manipulate the User Profile.  I made an attempt to use the Virto Software Workflow Activities add-on, but was not able to get it working as I expected.  (UPDATE: This may have been a permissions issue. YMMV)

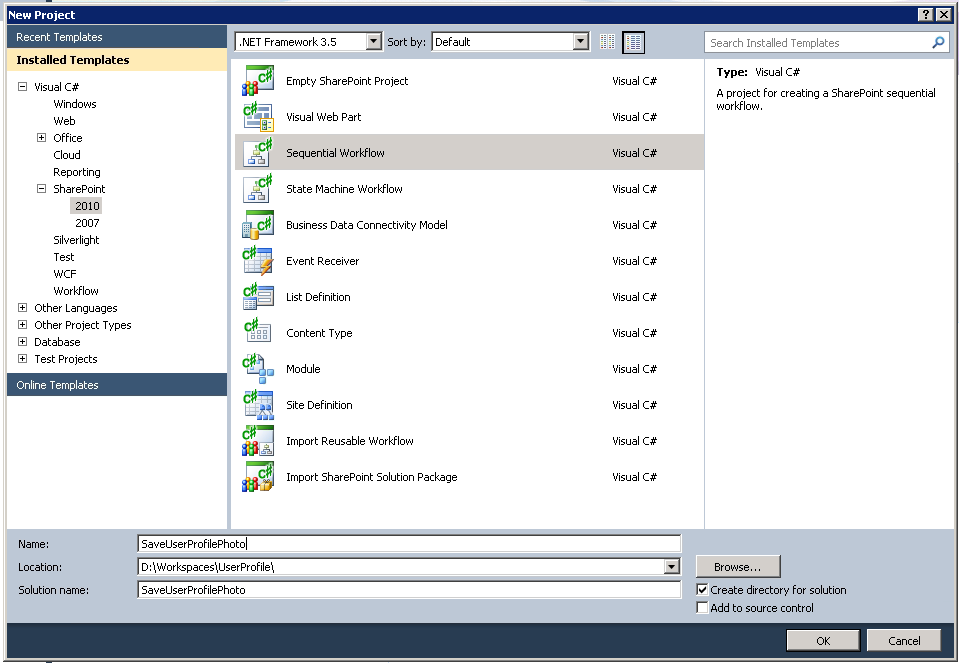
    So, we need to use a Visual Studio Sequential Workflow in order to get full access to the User Profile.  Here are the steps.

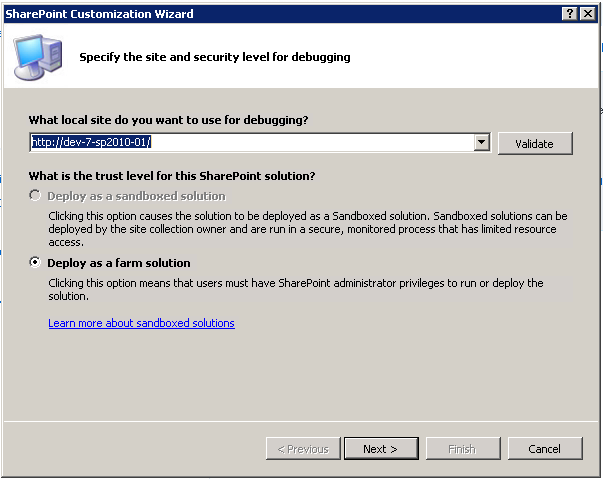
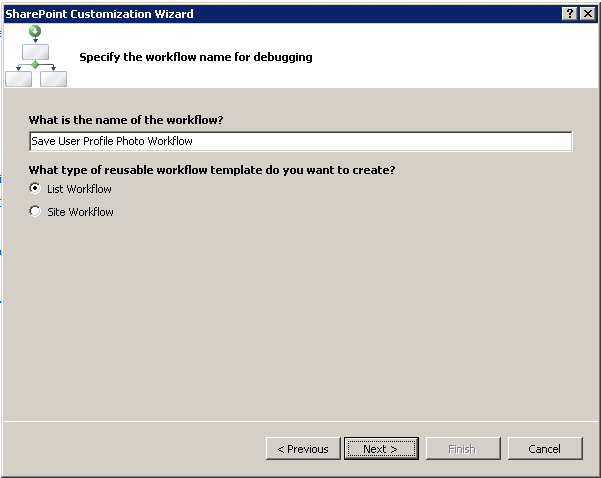
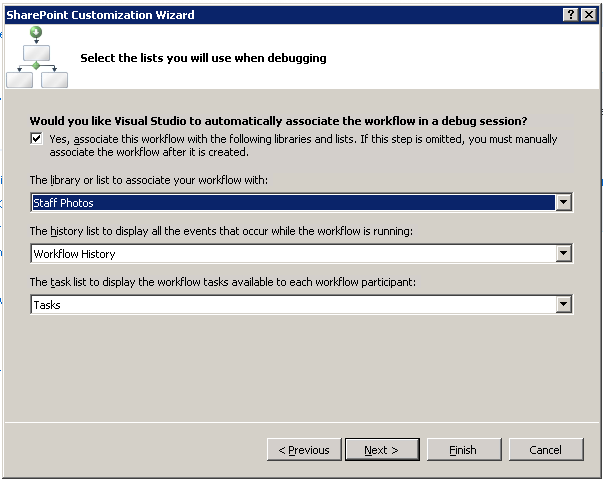
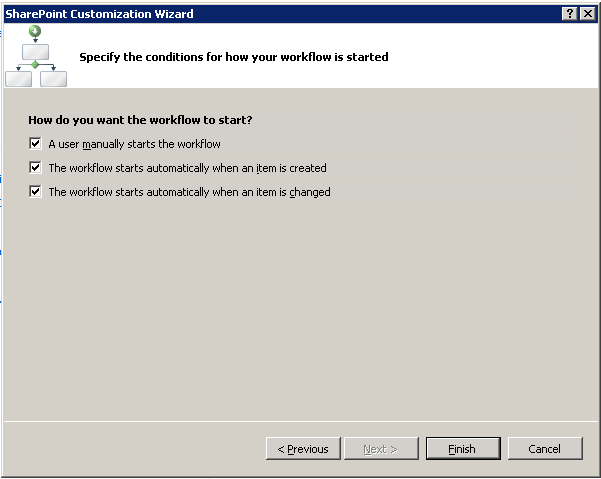
    First, create a new Sequential Workflow project in Visual Studio and go through the wizard

    01_NewProject

    02_ProjectWiz-1

    03_ProjectWiz-2

    04_ProjectWiz-3

    05_ProjectWiz-4

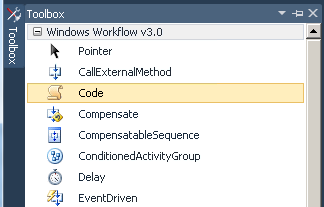
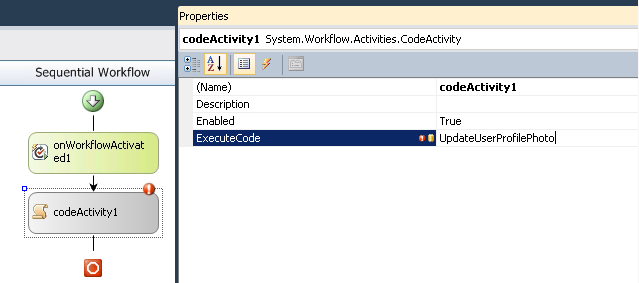
    Next, with the Workflow Designer open, select a ‘Code’ element from the Toolbox and drag it on to the workflow after the onWorkflowActivated1 event.

    06_WorkflowToolbox

    View the Properties for the Code element, and set the ExecuteCode property to “UpdateUserProfilePhoto”.  This will stub out a new method for you in the code file.

    07_SetExecuteCode

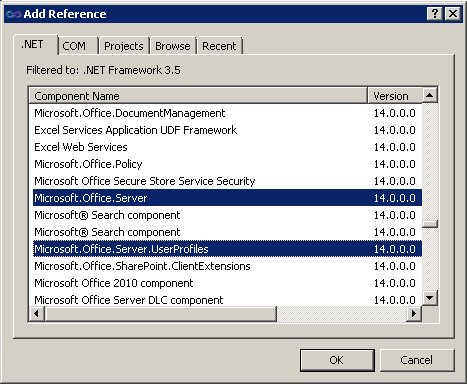
    Now, add the following references to your project:

    • Microsoft.Office.Server (14.0.0.0)
    • Microsoft.Office.Server.UserProfiles (14.0.0.0)
    • System.Web (2.0.0.0)

    08_AddReferences

    In your workflow code file, add the following using statements

    using Microsoft.Office.Server.UserProfiles;
    using Microsoft.SharePoint.Administration;
    using System.Web;

    And then add this code to the UpdateUserProfilePhoto method to implement our workflow sequence.

    private void UpdateUserProfilePhoto(object sender, EventArgs e)
    {
      try
      {
    
        //get username
        Microsoft.SharePoint.SPFieldUser fieldUser =
         (Microsoft.SharePoint.SPFieldUser)workflowProperties.Item.Fields.GetField("User Name");
    
        Microsoft.SharePoint.SPFieldUserValue fieldUserValue =
          (Microsoft.SharePoint.SPFieldUserValue)fieldUser.GetFieldValue(workflowProperties.Item["User Name"].ToString());
    
        if (fieldUserValue != null)
        {
          string username = fieldUserValue.User.LoginName.ToString();
    
          if (!string.IsNullOrEmpty(username))
          {
    
            //get profile record
            using (SPSite site = new SPSite(workflowProperties.SiteId))
            {
              SPServiceContext context = SPServiceContext.GetContext(site);
    
              UserProfileManager profileManager = new UserProfileManager(context);
    
              UserProfile profile = profileManager.GetUserProfile(username);
    
              //Updates values
              profile[PropertyConstants.PictureUrl].Value = workflowProperties.Item["EncodedAbsUrl"].ToString();
    
              //commits changes
              profile.Commit();
    
            }
          }
        }
      }
      catch (Exception ex)
      {
        //write to ULS
        SPDiagnosticsService diagSvc = SPDiagnosticsService.Local;
    
        diagSvc.WriteTrace(0, new SPDiagnosticsCategory("Workflow", TraceSeverity.Monitorable, EventSeverity.Error), TraceSeverity.Monitorable,
          "Error in Save User Profile Photo workflow: {0}", new object[] { ex.Message.ToString() });
        diagSvc.WriteTrace(0, new SPDiagnosticsCategory("Workflow", TraceSeverity.Monitorable, EventSeverity.Error), TraceSeverity.Monitorable, 
          "Error in Save User Profile Photo workflow: {0}", new object[] { ex.StackTrace.ToString() });
      }
    }

    Note that there are some slight variations between this code and the Powershell script, namely in the Encoded Absolute Url property name, and the property used to get the username value.

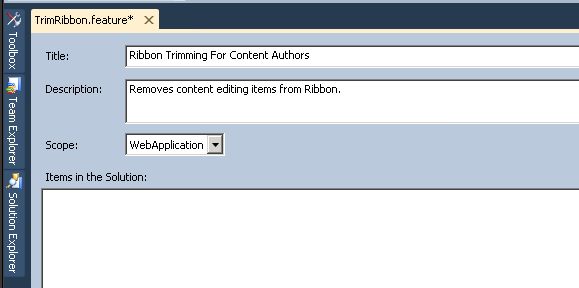
    The workflow is now ready to be deployed, so you can update the Feature and Package to your liking.

    There is one more crucial task in order to make this work, and that is to grant permissions for modifying the User Profile to the Application Pool service account for the web application in which this workflow will run. If you do not do this, you will receive the following exception when the workflow attempts to modify the profile record.

    Attempted to perform an unauthorized operation.
     at Microsoft.Office.Server.UserProfiles.UserProfileValueCollection.CheckUpdatePermissions()    
     at Microsoft.Office.Server.UserProfiles.ProfileValueCollectionBase.set_Value(Object value)    
     at SaveUserProfilePhoto.Workflow1.Workflow1.UpdateUserProfile(Object sender, EventArgs e)

    To grant this permission, go to the Manage Service Applications page in the Central Administration site. Select the entry for the User Profile Service Application, and click the Administrators button shown in the Ribbon.

    Add the application pool service account, then check ‘Full Control’, and save the changes.

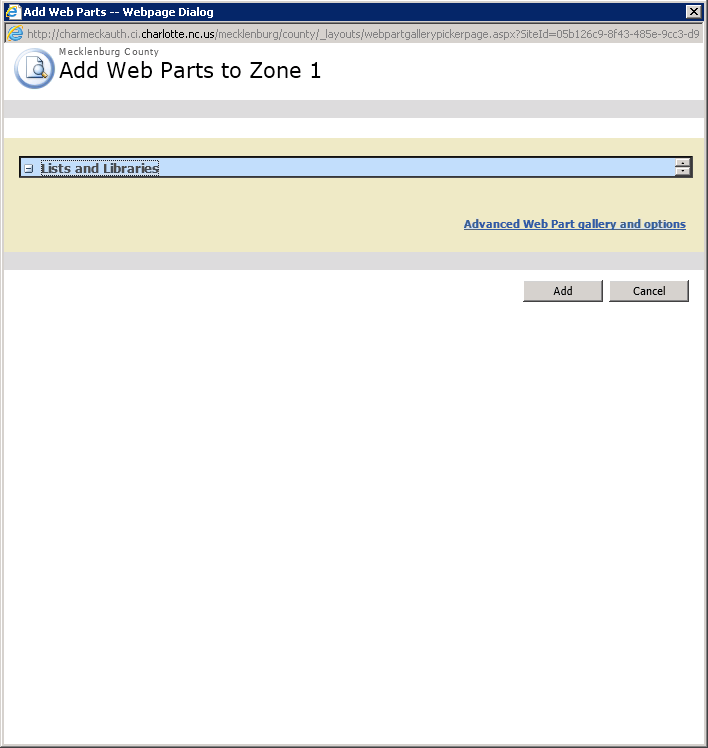
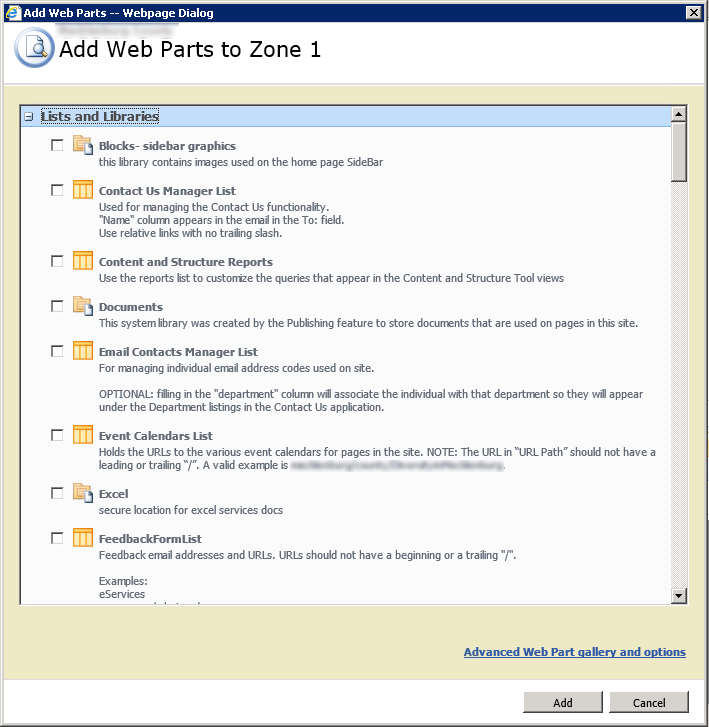
    Running the Workflow

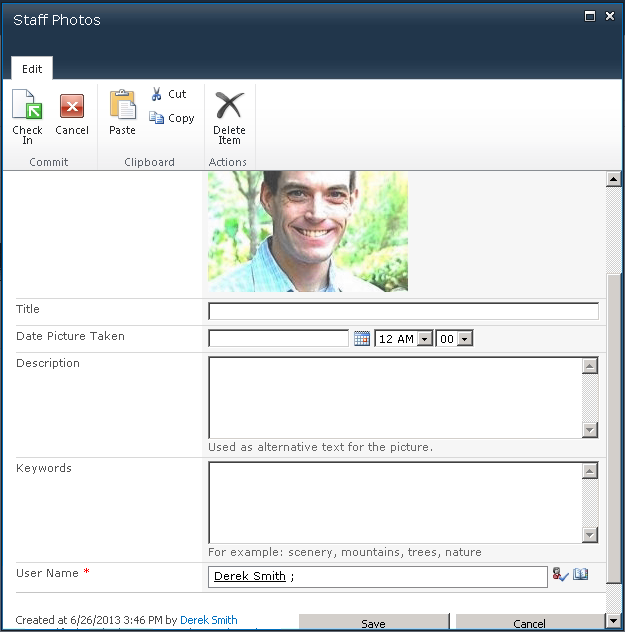
    To test the workflow out, we’ll add a new image to our Photo Library, being sure to select a person in the User Name field.  We also need to make sure we Check In the record, since workflow will not run on a checked out item.

    09_AddNewPhoto

    Clicking on the item and viewing its Workflow status will let us see if the Workflow ran successfully.

    11_WorkflowStatus

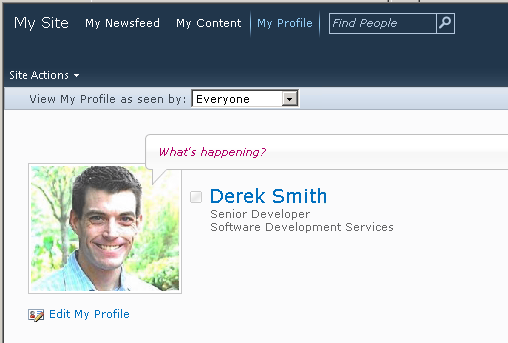
    Finally we can go to the user’s MySites profile page and confirm that the image is in place.

    10_MySitesProfileWithPhoto

    If the workflow code encounters any exceptions, they will be logged to the ULS file, so you can check there to see what happened.

  • How to Import user photos in to MySites profile

    I’ve come across several SharePoint installations where the HR department has used a Picture Library to store employee headshots.

    The frequent request is how to get those images on to the user’s MySites profile so they appear in search results and permissions lists. This post will walk through the process I used to pull the Image url from the Pictures Library and update the user’s profile using Powershell.

    Associate Picture Library record to a user name

    The first thing that is needed is a way to identify the Photo according to the employee. The simplest way to do this is by adding a ‘Person or Group’ column to the Photo Library Content Type. This column will let you use the People Picker to select their domain account, which is exactly what is needed to retrieve their MySites profile record.

    Add-Username-column

    Powershell Script

    The script is pretty straight forward.  Connect to the Picture Library, iterate through each entry, and for each one retrieve and update the User Profile record.  (The script below is adapted from what is found here.)

    The trick comes mostly from extracting the Domain user name from the column we just added.

    Add-PSSnapin Microsoft.SharePoint.Powershell
    
    #Site URL
    $mySiteUrl = "https://mysites.contoso.com/"
    #The picture library site/web Url
    $pictureLibUrl = "https://sara2.contoso.com/HumanResources/"
    #The name of the picture library 
    $pictureLibName = "Staff Photos"
    #The internal name for PictureURL property on Profile
    $profilePictureURLAttribute = "PictureURL"
    #The internal name for Login property on Profile
    $profileLoginAttribute = "AccountName"
    
    #Get site objects and connect to User Profile Manager service
    $site = Get-SPSite $mySiteUrl
    $context = Get-SPServiceContext $site
    $profileManager = New-Object Microsoft.Office.Server.UserProfiles.UserProfileManager($context)
    $profiles = $profileManager.GetEnumerator()
    
    #Get web object and connect to Picture Library
    $web = Get-SPWeb $pictureLibUrl
    $gallery = $web.Lists[$pictureLibName]
    
    write-host $gallery.ItemCount.ToString() "photo records found."
    
    foreach ($photo in $gallery.Items ) {
    	#get user assigment from column
    	$fieldUser = [Microsoft.SharePoint.SPFieldUser]$photo.Fields.GetField('User Name')
    	$fieldUserValue = [Microsoft.SharePoint.SPFieldUserValue]$fieldUser.GetFieldValue($photo['User Name'])
    
    	if ($fieldUserValue) {
    		$username = $fieldUserValue.User.UserLogin.ToString()
    		if ($username) {
    			#retrieve user's Mysites profile
    			$profile = $profileManager.GetUserProfile($username)
    			if ($profile) {
    				#$photo.url will contain the doc lib path
    				$newPictureUrl = $pictureLibUrl + $photo.Url
    				$profile[$profilePictureUrlAttribute].Value = $newPictureUrl
    				$profile.Commit()
    				write-host "User: " $username "PictureUrl: " $newPictureUrl
    			}
    		}
    	}
    }
    
    #clean up
    $web.Dispose()
    $site.Dispose()
    
    #create thumbnails in Mysites
    Update-SPProfilePhotoStore -MySiteHostLocation $mySiteUrl

    There are two main things to point out. First is using the SPFieldUser and SPFieldUserValue objects to pull out the domain name from the User Name field.

    #get user assigment from column
    $fieldUser = [Microsoft.SharePoint.SPFieldUser]$photo.Fields.GetField('User Name')
    $fieldUserValue = [Microsoft.SharePoint.SPFieldUserValue]$fieldUser.GetFieldValue($photo['User Name'])

    Second is that after you have assigned the Url to the User Profile and saved it, you must run the Update-SPProfilePhotoStore cmdlet in order to properly create the necessary thumbnail images used by MySites.

    #create thumbnails in Mysites
    Update-SPProfilePhotoStore -MySiteHostLocation $mySiteUrl

    Confirm Photo is on MySites Profile

    After running the script, you can confirm the photo assignment by either visiting the user’s MySites profile page, or by editing the profile in Central Admininistration.

  • Lessons from my first radio interview

    Lessons from my first radio interview

    3165626090_da9b184819_bThis month I had the privilege of being a guest on a the Home Toolbox Radio show to discuss HomeSpot HQ and home maintenance in general.  Since this was my first experience I thought I’d share a few of my own “lessons learned”.

    Prepare your remarks, but don’t assume you’ll use them

    When we were coordinating the interview, it seemed appropriate to prepare some specific talking points.  I had a document ready that had questions and answers.  In reality, the interviewer conducted the discussion much more casually, and so the prepared answered were all but unused.

    Your involuntary verbal ticks will naturally come out

    In listening to the recording of the interview, I was embarrassed to hear how often I used the phrase “you know” as I gave my responses.  It is complete unconscious to me while I am speaking (you know?).  Try to prepare yourself to become hyper-sensitive to these phrases so that you will be able to catch yourself and minimize how frequently you say them.

    Find a good room

    Since the radio show was in Ohio, I called in as the guest.  Since I have children, the last thing I wanted was for one of them to burst in to the room and interrupt while I was on the air.  Solution?  I locked myself in the bathroom.  However, it may not have been a good choice given that it had both vaulted ceilings and lots of hard surfaces that create echoes.  The walk in closet may have been a better option since it was both smaller and the clothing would have helped reduce echo.

    Be confident

    Chances are you’ve been asked on the program because you’re considered an expert on the topic at hand.  When you boost your own confidence in your responses, they will come out clearer and more concise.

    You can listen to my radio interview below.

    Photo credit: https://www.flickr.com/photos/varresa/

  • Windows does have magic powers

    Windows does have magic powers

    I ran in to this error message today while trying to build a Visual Studio project.

    Magically-locked


    I guess I’ll have to track down my spell book or magic wand to get this unlocked so I can overwrite it.


  • Visual Studio 2012 has unexpectedly stopped

    Wow, what a mess.

    After installing Visual Studio 2012 Update 2, whenever I would launch VS2012, the start page would come up, and then the application would immediately crash.

    Simultaneously (and I suspect related) in Visual Studio 2010, when I would try to view the Team Explorer, all my team projects were showing with a nice big red ‘X’ on them.  I could not expand the project node, which means I could not get to any work items, or the Source Code Explorer.

    Also of note, an automatic Windows Update had taken the liberty of installing Internet Explorer 10.  Gee, thanks for that.

    After spending a full day trying to remove Visual Studio hotfixes, repair VS2012, rebooting (and more rebooting).  I was getting nowhere.

    I installed DebugDiag and tried to make sense of the crash dumps.  No smoking gun there.

    I googled for clr.dll and ntdll.dll and kernelbase.dll.  All red herrings.

    Then I tried to launch SQL Server Management Studio 2008 got this error:

    Unable to cast COM object of type ‘System.__ComObject’ to interface type ‘Microsoft.VisualStudio.OLE.Interop.IServiceProvider’. This operation failed because the QueryInterface call on the COM component for the interface with IID ‘{6D5140C1-7436-11CE-8034-00AA006009FA}’ failed due to the following error: No such interface supported (Exception from HRESULT: 0×80004002 (E_NOINTERFACE)). (Microsoft.VisualStudio.OLE.Interop)

    Okay, this is a mess.  I would not have guessed that SSMS would have pulled in anything from Visual Studio, but there it was, plain as day.

    Looking for guidance on this error brought me to this blog post, which gave the following explanation:

    You would get above error if ieproxy.dll is not registered properly. Re register Ieproxy.dll.

    C:\Program Files\Internet Explorer>regsvr32 /u ieproxy.dll
    C:\Program Files\Internet Explorer>regsvr32 ieproxy.dll
    C:\Program Files (x86)\Internet Explorer>regsvr32 /u ieproxy.dll
    C:\Program Files (x86)\Internet Explorer>regsvr32 ieproxy.dll
    Following these steps threw errors on the /u calls, but showed success messages on the register calls.
    Big moment of truth – launching VS2010 and going to Team Explorer.  Fantastic!  Loaded without nasty red X.
    Bigger moment of truth – launching VS2012.  Opened and stayed open!
    And SSMS loaded up great as well.
    My guess is that either during the IE10 install, or the Update 2 install, or the dozens of other Windows Update hotfixes and security updates, that ieproxy.dll got either corrupted or unregistered without being put back in place.
    Now the task of adding back Update 2 and seeing if it is the problem or was just a victim of some other undoing.
  • Why are you lying to me Mr. Progress Bar?

    Why are you lying to me Mr. Progress Bar?

    As long as there have been computers that do work, there have been various forms for communicating progress to the user.

    I find these often to be a bunch of lying liars.

    When the bar fills up, the operation should be complete.  If it’s not, then don’t fill up the bar.

    Here’s the dialog that prompted this post. It is the installer of a Visual Studio update.  The bar is filled up, but clearly there is more work to be done.

    Web usability expert Jakob Nielsen writes about acceptable response times for actions done by a computer in his book published in 1993!

    In cases where the computer cannot provide fairly immediate response, continuous feedback should be provided to the user in form of a percent-done indicator [Myers 1985]. As a rule of thumb, percent-done progress indicators should be used for operations taking more than about 10 seconds. Progress indicators have three main advantages: They reassure the user that the system has not crashed but is working on his or her problem; they indicate approximately how long the user can be expected to wait, thus allowing the user to do other activities during long waits; and they finally provide something for the user to look at, thus making the wait less painful. This latter advantage should not be underestimated and is one reason for recommending a graphic progress bar instead of just stating the expected remaining time in numbers.

    To their credit, the Visual Studio team did provide a sprite so there was some motion while the installation took place.  But contrary to Nielsen’s suggestion, a filled up progress bar did not “make the wait less painful.”  It just plain irritated me.

    In the same way that developers should make their error messages meaningful, the status reported out to users should be useful and convey accurate information.


    Photo credit: https://www.flickr.com/photos/jacksonmedeiros/2719799718/

  • April 2013 Cumulative Update for SharePoint 2010 breaks Add Web Part dialog

    April 2013 Cumulative Update for SharePoint 2010 breaks Add Web Part dialog

    For a site running on SharePoint 2010, but still using the 2007 user experiences (also known as UIVersion = 3), the April 2013 Cumulative Update for SharePoint 2010 causes the Add Web Part dialog page to break in Internet Explorer.

    After applying the CU, the dialog does not properly resize to display all the available web parts.

    add-web-part-broken

    This problem only occurs in Internet Explorer.

    After reviewing all the Javascript on the page and master page that is supposed to calculate and resize the display, I remembered that the CU had been recently installed.

    Sure enough, when I compared the files to ones on a server that had not received the CU, the files were different.

    Here’s the file from Service Pack 1

    picker-dialog-pre-CU

    And here it is from April 2013 CU.  Based on the file date, it may have actually been the February 2013 CU that introduced the change.

    picker-dialog-post-CU

    To see what exactly had changed, I used Notepad++ to compare the two files.

    picker-dialog-compare

    As can be seen, the 2013 file (on the left) had a new meta tag added to force the display mode for Internet Explorer.  It appears that this caused IE to misreport the content height while resizing the dialog.

    Simply commenting out the extra meta tag allowed the dialog to resize properly in Internet Explorer.

    add-web-part-fixed

    For SharePoint 2010 sites using the 2010 User Experience (that is, UIVersion = 4), this is a non-issue since the Add Web Part selector is part of the ribbon, not in a dialog window.

  • Upgrading a MacBook Pro with an SSD

    Upgrading a MacBook Pro with an SSD

    One of the relatively cost-effective methods for extending the useful life of a computer these days is to upgrade to a Solid State Drive.  By eliminating the physical spinning disc and its latency, an SSD provides a noticeable boost to any desktop or laptop’s performance.

    I elected to do a clean operating system install on the SSD rather than cloning my existing drive.  I used a USB-to-SATA external enclosure to mount the SSD.  From there, I ran a clean install of OS X Mountain Lion and selected the external drive as the destination.  I confirmed the OS install by booting from the USB drive and everything came up fine.

    Then it was time for the physical install of the SSD into the MacBook Pro.

    You will need:

    • a very small Philips screwdriver.  In my case, the External enclosure came with one that worked great.
    • a small Torx driver.  This is used to remove the ‘lugs’ that are installed on the drive itself.  I didn’t have a Torx driver small enough, so was able to use needle nose pliers to gently remove and install the lugs.

    I recommend a good open workspace with plenty of light.  The screws involved are quite small and would be easy to misplace.

    First, flip the MBP over and carefully remove the 10 screws that hold on the bottom panel.  These are not all the same length, so keep track of which hole they go in to.

    IMG_9767

    Carefully lift of the bottom cover.  As you can see in the picture, there was plenty of dust to be cleaned up.  Be gentle.

    IMG_9768

    The hard drive is in the lower left, and is held in place by a plastic ‘bar’ along the top edge of the drive.  This bar is held in place by 2 more screws.  Note: these screws won’t come all the way out, so just get it loose and gently lift off the retaining bar.

    IMG_9769

    After removing the retaining bar, pull on the plastic tab to pivot the hard drive towards you.  Slide the drive up and out, being careful of the power/SATA cable that runs underneath it.  As soon as you are able, disconnect the power/SATA connection.

    IMG_9770

    With the old drive free, you’ll see 4 lugs on the edges of the drive, one in each corner.  These lugs need to be transfered to the new drive.  Use a Torx driver (or small pliers) to remove them from the old drive and put them on the new one.

    IMG_9771

    After the lugs are in place, connect the power/SATA cable to the new drive, and place the drive into the bay.  Tip it up, get the lugs under the lower retaining bar, then settle it in to the upper retaining bar.  Finally, replace the top retaining bar and tighten the screws down.

    IMG_9773

    Finally, replace the bottom cover and get all the screws in place.

    Since I had already gone through the Mountain Lion first load sequence, my first boot with the SSD went right to the login screen.

    I don’t have any particular benchmarks, but the user experience is noticeably improved.  Overall load up of applications generally occurs within one or two bounces on the dock.

    For under $200, an SSD drive will easily add plenty of life to your hardware.  I don’t know what took me so long!

    (Let it be said too, I got SSDs for a 2006 era Dell desktop, as well as my wife’s 2009 MacBook and all three systems are performing great.)

  • Security trimming the SharePoint Ribbon

    Security trimming the SharePoint Ribbon

    The SharePoint 2010 ribbon control provides various toolbars used by content authors and contributors, particularly when creating and editing Publishing pages.

    But what if your organization doesn’t want to allow certain user groups to change formatting, or select different fonts, in order to maintain a standardized style.  In this case, dynamically changing the ribbon control based on the user’s permissions or group membership allows an organization to determine what and how a user may do while editing content.

    The default Edit Ribbon displays as follows when the user selects an HTML content area:

    default edit ribbon

    Here are the revisions to the ribbon we will make.  Some buttons will be removed altogether, and others will be security trimmed.

    Desired trimmed ribbon

    Creating a custom Ribbon Trimming Control

    To apply the changes to the ribbon, we’ll create a basic control that can be added to the Master Page.  Start by creating a new Empty SharePoint Project in Visual Studio 2010.

    Add references to System.Web and Microsoft.Web.CommandUI.

    Add a class to the project as follows:

    using System;
    using System.Web.UI;
    using System.Web.UI.WebControls;
    using System.Web.UI.WebControls.WebParts;
    using Microsoft.SharePoint.WebControls;
    using Microsoft.SharePoint;
    
    namespace MyApp.TrimRibbon
    {
      public partial class RibbonSecurityTrimmer: UserControl
      {
        protected void Page_Load(Object sender, EventArgs e)
        {
          SPRibbon ribbon = SPRibbon.GetCurrent(this.Page);
          if (ribbon != null)
          {
            //remove following controls for all users
            ribbon.TrimById("Ribbon.EditingTools.CPEditTab.Font.Fonts");
            ribbon.TrimById("Ribbon.EditingTools.CPEditTab.Font.FontSize");
            ribbon.TrimById("Ribbon.EditingTools.CPEditTab.Font.FontColor");
            ribbon.TrimById("Ribbon.EditingTools.CPEditTab.Font.FontBackgroundColor");
            ribbon.TrimById("Ribbon.EditingTools.CPEditTab.Markup.LanguagesLabel");
            ribbon.TrimById("Ribbon.EditingTools.CPEditTab.Markup.Languages");
    
            //remove View HTML markup control for anyone who does not have Full Control rights to the site.
            if (!SPContext.Current.Web.DoesUserHavePermissions(SPBasePermissions.FullMask))
            {
              ribbon.TrimById("Ribbon.EditingTools.CPEditTab.Markup.Html");
            }
          }
        }
      }
    }

    Create a Feature to deploy this project’s assembly in to the GAC.

    RibbonTrim Feature

    Be sure to set the Scope to WebApplication so the assembly is globally available.

    Set up the deployment package to include the Feature you just set up.  Keep in mind you’ll need to ensure that a Safe Controls entry is added to the web.config file for the web application during deployment.  

    Deploy to the SharePoint farm and activate the Farm solution.  The assembly should be provisioned in to the GAC (which you can confirm by opening Windows Explorer to c:\windows\assembly.)

    Updating the Master Page

    Open Master Page (either in a branding solution, or using SharePoint Designer)

    Add Register tag before the <html> tag to pull in Assembly.

    <!-- Ribbon Trimming Control -->
    <%@ Register TagPrefix="MyApp" Namespace="MyApp.TrimRibbon" Assembly="MyApp.TrimRibbon, Version=1.0.0.0, Culture=neutral, PublicKeyToken=bda84fa329198d63" %>

    Add the control tag in Body section of Master Page.

    <!-- control to trim ribbon -->
    <MyApp:RibbonSecurityTrimmer id="RibbonTrim1" runat="server"/>

    Save and deploy master page.  If you’re using SharePoint Designed, check in and publish your changes.

    To confirm the security trimming is applied, load a page that uses the Master Page you modified, go in to edit mode, and view the revised ribbon.

    Here it is for a user without Full Control rights

    trimmed ribbon

    Here it is for a user with Full Control rights (notice the return of the HTML drop down near the right side.)

    trimmed ribbon full control

    MSDN has a full list of the enumerated SharePoint Permissions and a list of the button control ID values.

    This blog post maps those permissions to the Permission levels typically associated to SharePoint groups.

    Using this approach, you can easily create different variations of the Ribbon for each group of authors, contributors or editors, just by applying different checks using the SPContext.Current.Web.DoesUserHavePermissions method.

    If you need to add additional parameters to control the trimming, you can do that by exposing public properties in your class and setting them in the control tag when you place it on the Master Page.